

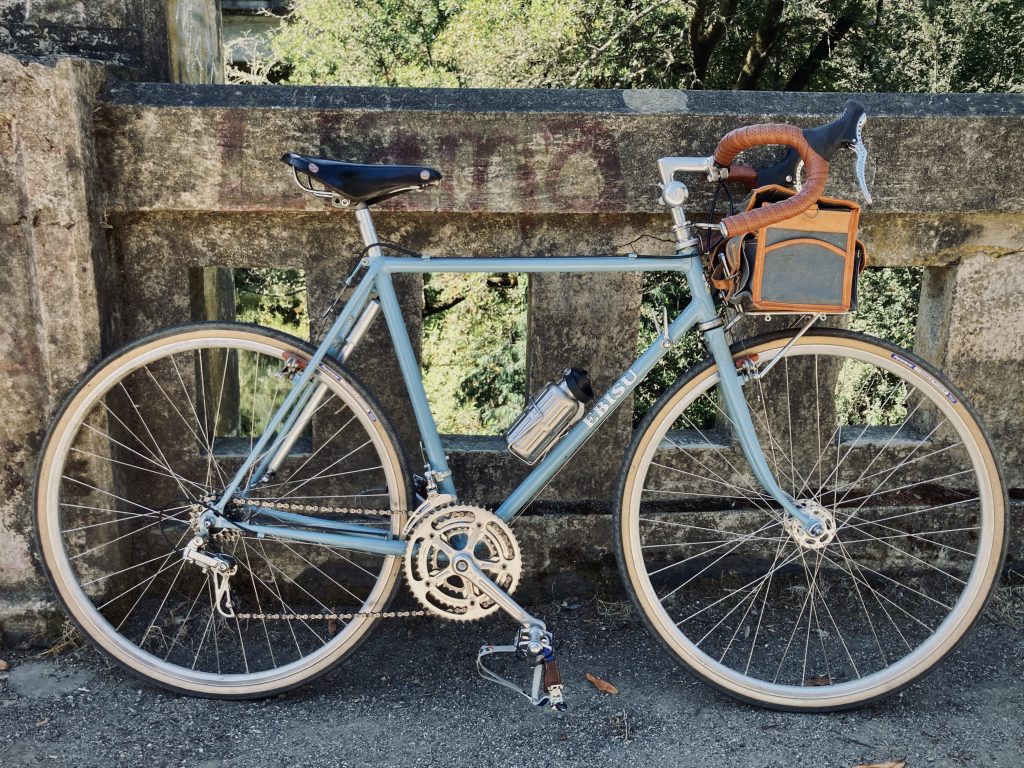
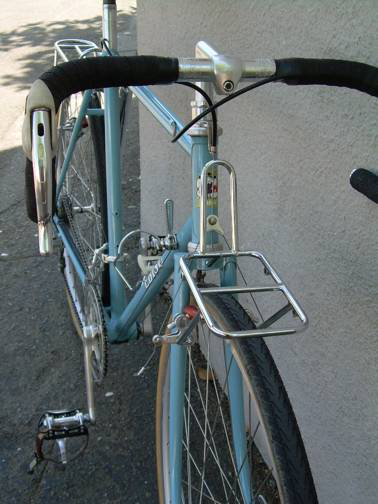
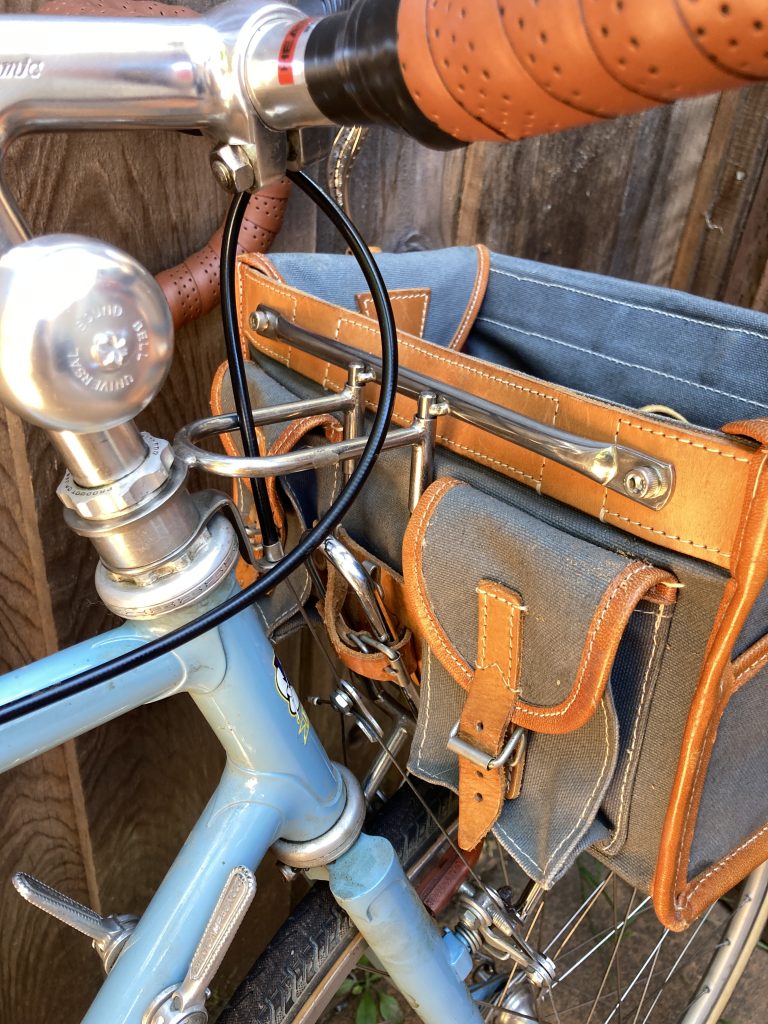
taken 2025, with newly updated “cockpit”
(I wrote this in 2007. See bottom of page for recent updates)
The frameset is an Ebisu all-purpose designed by Hiroshi Iimura at Jitensha Studio in Berkeley. According to Wikipedia, the name Ebisu denotes “the Japanese god of fishermen, good luck, and workingmen, as well as the guardian of the health of small children. He is one of the seven Gods of Fortune and the only one of the seven to originate from Japan.” A quick Google search will reveal all sorts of interesting information about Hiroshi, his background, influences, and design philosophy–including his involvement in the design of the first Honda Civic! Because I went to high school just down the street from his shop, I have known Hiroshi for years. As a road racer in the late 80’s-early 90’s, I would spend time in his shop talking with Hiroshi and his mechanics, browsing the stack of cycling magazines from around the world, asking about the vintage parts displayed on the walls, the latest Bridgestone models he was selling (he was a mentor to Grant of Rivendell fame), or whatever project bike that was taking shape on his workbench. Slowly, my own bicycle aesthetic has matured and come into line with his, as I made that transition from late-20’s ex-racer, to mid-30’s (now early 50’s!) recreational rider. A combination of French, Italian, and Japanese influences, all steel, comfort being the highest priority, but not at the expense of a relatively clean look. I had originally thought about ordering a completely custom frame from a US builder, but then I realized that even if I were given the opportunity to order a frame from the ground up, it would be a lot like the production Ebisu—even the color. So that’s what I went with. Here is the finished product (in 2006):
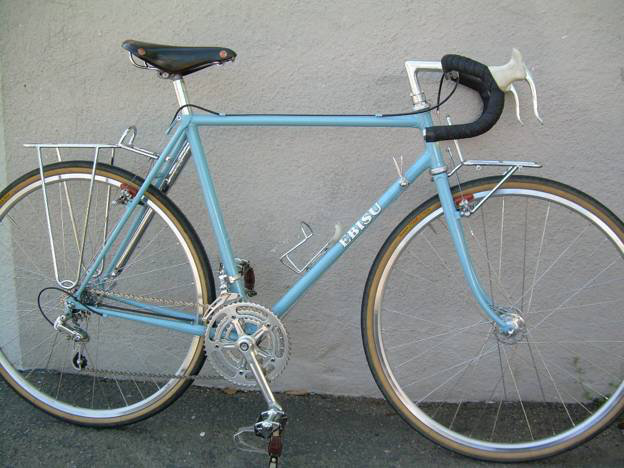
The frame I ordered was pretty much stock, with a few key modifications:
1. top tube rear brake cable guides go along the right side, to accommodate my left-hand-rear-brake setup.
2. Increased fork rake of approx 10mm, with more bend at the bottom, mainly for looks, but also to stabilize the handling and a bit more shock absorption
3. Braze-ons to mount a frame pump to the left side seatstay (see below)
4. Custom racks.
5. Blue/gray color (many of Hiroshi’s colors remind me of those used on German sportscars in the 1960’s)
A few details:
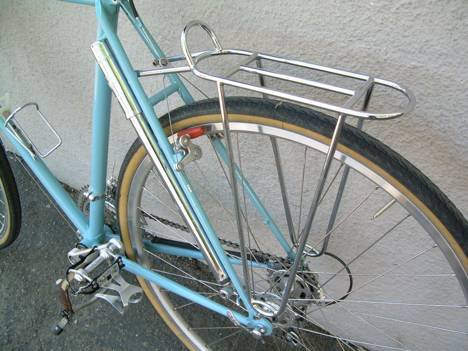
The custom rear rack turned out very nice. It is inspired by a rack I saw on a Mariposa, and combines the utility and verstility of a modern pannier rack , with the less intrusive look of a traditional French rack (e.g. Rene Herse, Alex Singer, etc.). It is not as wide, and doesn’t seem to stand out as much as a squared-off rack. I won’t feel the need to remove it whenever I’m not carrying a load.
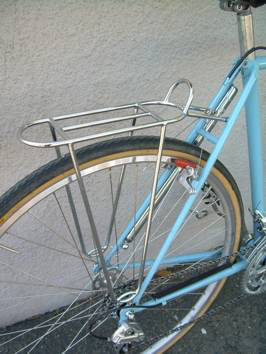
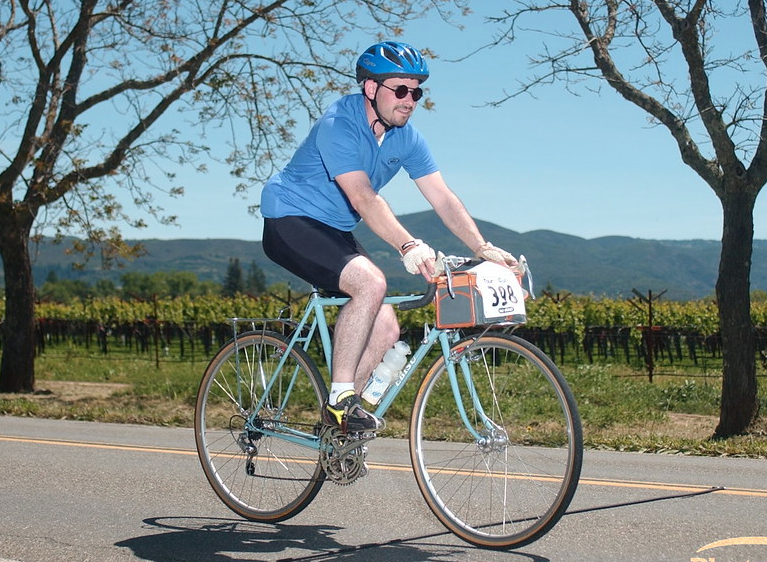
There is also a front rack. It is custom, in the sense that Hiroshi designed it specifically for Ebisu bikes, and will not sell it for use on another bike. Whenever I ride this bike, I have a Gilles Berthoud bag sitting on the rack.
Components:
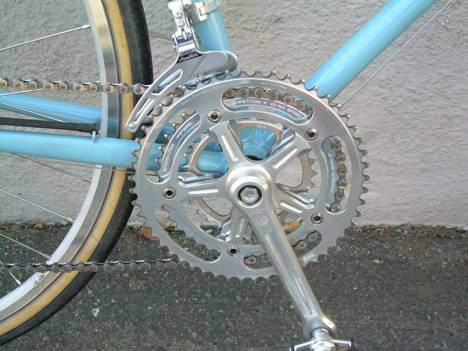
The 10-week turnaround time (back in 2006!) has allowed me to think carefully about what parts I want to use, and to acquire some of the parts which I do not yet have. The majority of the parts are Campagnolo Nuovo Record. Despite a few functional drawbacks, no gruppo can compete for sheer beauty. One of my main inspirations is the Raleigh International. Some may argue that this bike had somewhat of an identity crisis, but you could also say that it combined the best of racing and touring function and aesthetics. There are a few necessary departures from this gruppo, but I will only use parts which are from more or less the same time period and retain the general aesthetic: Mafac cantilevers, early Shimano 600 headset and rear derailleur (with “arabesque” ornamentation), early Dia Compe Grande Compe aero brake levers, TA sealed bearing BB (practically invisible)… I think that’s all. In addition, I’ve modified the crankset to accept a third “granny” chainring, using a TA “triplizer” ring from Peter White Cycles, and a front derailleur that can handle the range.
Adapter for frame pump.
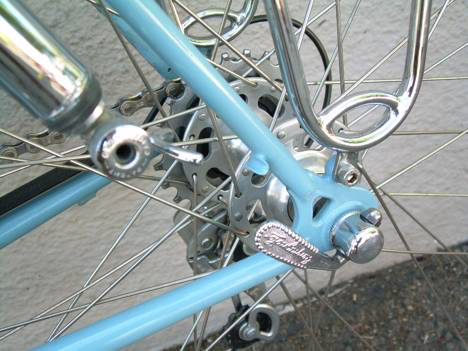
I’m tired of having a frame pump along the top tube. You can’t pick up the bike by the top tube, and it always gets in the way when I try to shift the front derailleur with my right hand. If you mount it along the seat tube, it prevents you from using a second water bottle. A traditional and elegant solution is to put it along the left-side seatstay. Only problem is: how to fit the Campagnolo pump head, which is made to fit in the corners of the main triangle? Hiroshi has borrowed a Toei design of a “lip” that holds the pump head near the rear dropout, without touching the seatstay. See detailed photo below.
Note the early Shimano 600 long cage derailleur–their answer to the Campagnolo Rally, and just as pretty. That’s a Suntour ultra-6 freewheel, 14-24. Rear spacing on the frame is the standard 130mm. Retaining the 5-speed freewheel spacing and adding spacers to the left side of the axle not only prevents the axle from bending, but has allowed me to build up a wheel with almost no dish (offset).
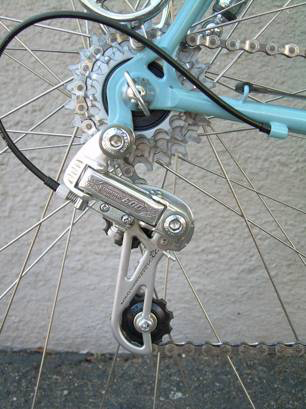
TA “triplizer” middle ring, with a 30 tooth inner. Note the Suntour Mountech front derailleur. Handles the 30-42-52 range no problem.
Update, 2022:
This bike has been very lightly used, to say the least. I purchased this bike just before the birth of my first child, knowing that I’d have less time and resources in the future, but also knowing that my Ebisu will be there for me when I’m ready to ride it. Given this light usage, I have not needed to change or upgrade any components, except the tires (from cracking, not wear!). Here are a few changes I’m considering, in order to make the bike more comfortable:
1. wider tires. Given the extensive research from Jan Heine and others about the many benefits and few drawbacks of wider tires at lower inflation, I am glad this frame will accommodate a 36mm tire. I’ll stick with Panaracer Pasela for now.
2. higher rise stem. For my old back, I’d like to raise the stem so the handlebars are at least above the seat.
3. Randonneur-shape bars: thinking about more hand positions and a higher resting place on the tops
4. Decaleur attachment? I’ve been happy with leather straps connecting the bag’s side loops to the handlebar, just below the brake levers. But a higher handlebar may complicate that. Luckily, there are a few attachment options still available.
5. As a gift from my family a few years back, I received a Velo Canteen. It fits the look of the bike, is insulated, and isn’t plastic.
Update 2025:
As you can see in the top photo, I have make the front end a lot more more comfortable with the following components:
-Rene Herse Randonneur handlebars (made by Nitto). Expensive, but the curves provide a variety of comfortable hand positions.
-TRP (Tektro) RRL-SL brake levers. Vintage-inspired drilled levers, with a very comfortable modern position.
-Nitto Technomic stem, which brings the handlebars a few inches higher than the stem, and makes for a variety of comfortable positions, and higher drops. A strategically-placed bell breaks up the perceived length of the quill.
-Brooks synthetic leather bar tape looks and feels good. Barring crashes, it should last longer than the Cinelli cork tape I have used for a long time.
–still using Pasela 28 tires, but at 55psi. Why didn’t I do this earlier?!
also:
-Velo Orange steer tube-mounted Decaleur attachment. Long out of stock, this provides just enough stability for my purposes.
Unfortunately, the rear rack chrome plating has been damaged by rust, despite the lack of outdoor exposure. I will have to have it re-chromed in order to use it again. The front rack has been fine.